Edit Levels
Edit Pipe Levels
Command: EDL
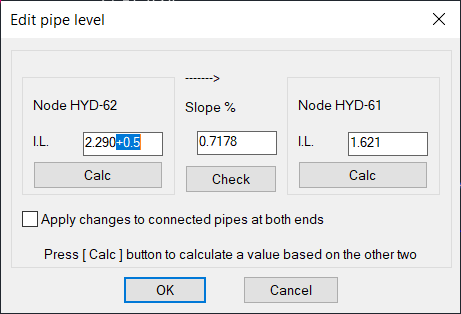
If the selection set was one pipe:
Here user can change both levels or one of them then press ok, the Slope button is only for checking.
Pressing Calc button means other values are fixed:
- Pressing the right Calc button means the left value and the slope are fixed and the right value will be calculated.
- Pressing the middle (Slope) Clac button will calculate the slope by fixing the other fixed values.
- Pressing the left Calc button means the right value and the slope are fixed and the left value will be calculated.
Note: It is possible to use + or – to add or subtract values as highlighted in the picture.
Apply changes to connected pipes at both ends is self explained.
If the selection set was sequence of pipes in a profile:
Same dialog box will appear but the nodes this time are the first node in the segment and the last one, pressing OK will apply the levels to all pipes resulting on straight line with the given slope. (here the network connection type will affect the way the pipes will be connected)

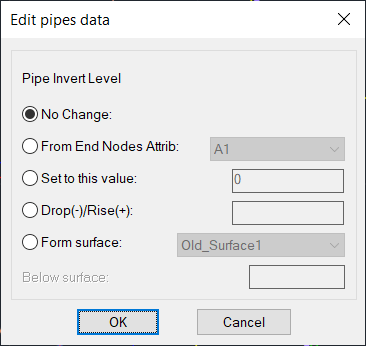
If the selection set was multiple pipes in the layout:
Then this new dialogue will appear:
1- If the levels are written in the Attribs of the node they can be copied before applying layout style as they will wipe out the attrib contents.
2- Fixed value for all pipes
3- Add to /Subtract value from all levels of the pipes selected.
4- Get the levels form a surface by specifying the surface and the depth to the (invert/crown/center)
Note: levels to be set are based on the connection type of the network, the dialogue will show the correct point to be set whether it was on invert, center, or crown of the pipe.